

Art Supply Resources
Setting Up Your Studio
A common mistake in setting up a studio is to buy lots of very expensive equipment far exceeding immediate needs and technical competence. In photography for example, an expensive camera does not necessarily make a better photographer – a simple camera in the hands of a skilled photographer can produce very high quality work.
When setting up a studio, it is not necessary to spend vast sums of money - much less can be spent for perfectly decent facilities that will enable you to produce excellent work. Very highly sophisticated and specialized equipment is best reserved for people who work for a very narrow part of the market.
Your studio need not be a large room, but it should be light, airy and well-organized, with the items you use most frequently at hand. The first requirement is that it should preferably have no other purpose. Choose a room with good natural light. A large window facing north (in the northern hemisphere) is considered to be the best. Why facing north? That way you avoid direct sunlight which changes in intensity and direction throughout the day. It is very difficult for the eyes to adjust to a situation where one minute, you have piercingly strong and intense sunlight falling on your work and the next minute, a cloud passes across the sun and you can hardly see what is in front of you. North light offers a filtered, reflected and fairly constant level of illumination.
Of course, you will need artificial light some of the time. For general studio lighting, strip fluorescent lights give the most even illumination over larger areas. One of the problems with all interior lighting is that the values of colors change from what they are in daylight. Strip lighting can be obtained with light values balanced very closely to those of daylight.
For lighting close to the working surface, you can buy good light fittings that clamp on to your table. Good fittings are also available mounted on a heavy base, or they can be fixed to a wall just where you want them. Whichever means you prefer, make sure that you have the floating-arm type of light to direct the beam to the part of your work that requires it most. Some adjustable lamps come with fluorescent light sources, others with a combination of fluorescent and incandescent. These are better for color work than the purely incandescent type.
You will certainly need a good drawing board. It is worth spending as much as you can afford on this item. To do really accurate mechanicals, you have to have the guarantee of absolute squareness at all parts of the working surface. If you cannot afford one with an attached drafting machine system, it should at least have a well set straightedge down the left-hand side, offering a good run for a T-square. Your board can either be a free-standing unit or one placed on a tabletop. If it is free-standing, choose one with a sturdy base. The height and the angle of the board must be adjustable. If you are using a table as a mount for your board, make sure that the tabletop is solid and strong. In either situation, you cannot do accurate work on a rickety base.
helpful hints
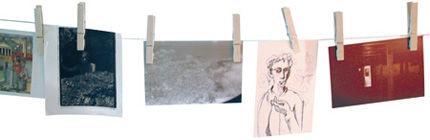
How to Make a Clothesline File
Thread a strong string through clothespins and hang the string in a convenient out-of-the-way place. Stops to prevent pins from sliding into each other can be made by securing pieces of tape around the string. You can keep items you are currently working clipped on the line.
Generally speaking, your working height should be such that you are looking down on your work, rather than along a shallow angle of view. Some designers use stools, but this is not always either comfortable or good for your posture. Chairs support the base of the back and enable you to work over long periods in comfort.
A light box is very helpful for visualizing purposes. It saves time in tracing down material from illustrations, type or photographs, and it gives you greater control of accuracy over small details. It is also very useful for viewing color slides and transparencies. Tabletop models of various sizes are available. You will also need space for cutting, trimming and mounting work, so allow room for a cutting mat.
Keeping Tools In Their Place
Prevent knocking things off your table with your T-square
If you are one of those artists who sometimes works with a cluttered work table and you are constantly knocking items to the floor, draw or tape a heavy line at the extreme right (or left) end limits of your T-square. Treat this line as a boundary and never put any items to the left (or right) of it where they would interfere with the action of your T-square or get knocked down. Prevent tools and other stuff from sliding off your table
1)Try rubber cementing a large piece of sandpaper to the right (or left) side of your table.
2)Glue a thin strip of sandpaper to the bottoms of frequently used items that slide easily such as bottles of rubber cement, rulers and tape dispensers.
3)Attach a thin strip of wood to the bottom edge of the table.
